Can CLO Handle Garment Simulation and Final Rendering in One Tool? A Practical Workflow Guide
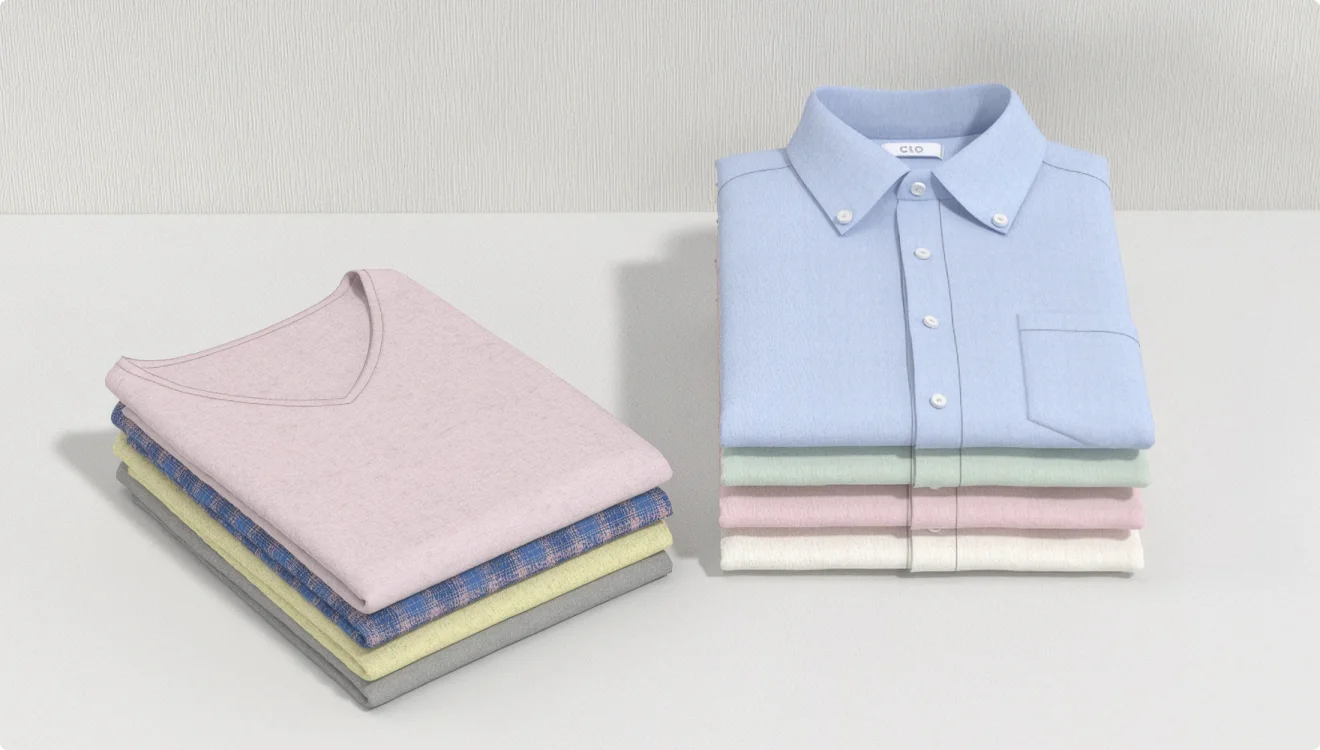
Yes, CLO can simulate a garment and render its image in one application.
- CLO simulates garment fit and drape using garments, avatars, patterns, and fabric properties.
- CLO includes an internal renderer for creating realistic, high-quality images of 3D garments.
- The CLO 2026.1 feature page documents rendering selected grading sizes together.
- Use a separate application when the delivery brief calls for a distinct scene, animation, interactive, or compositing workflow.
Can CLO simulate a garment and create its final image in the same tool?
Yes. CLO supports garment fit-and-drape simulation and includes an internal renderer for garment images. CLO's Help Center answer about rendering confirms that the application includes a renderer for creating realistic, high-quality images of 3D garments. For a fashion team producing a still image of a simulated garment, simulation and rendering can therefore sit in one application.
The two stages answer related but different questions. Simulation calculates how the garment behaves on an avatar under the selected garment, pattern, and fabric conditions. Rendering creates an image from the 3D scene, including how its materials, lights, and shadows appear. Autodesk's rendering overview defines rendering as creating a raster image from 3D scene objects, with a renderer calculating material appearance and lighting and shadows from scene lights.
That distinction helps you choose the right approval artifact. A fit review asks whether the garment's simulated shape and drape answer the product-development question. A presentation image asks whether the garment reads clearly in the chosen view, light, material appearance, and setting. The same project can need both, and an image by itself is a presentation of the simulated scene rather than a substitute for a fit review.
For example, a product developer might first review the silhouette and drape on an avatar, then produce a front-facing still for a line review. Both tasks can stay in CLO when the image brief is a still of the simulated 3D garment and the in-application image meets the team's presentation needs. A project can move to a separate renderer when the requested deliverable depends on additional scene-building, animation, or compositing functions described later in this guide.
Which parts of the visualization workflow can stay together?
The in-application workflow is especially straightforward when the deliverable is a fixed garment view. Examples include a front or back view for a product discussion, a detail view that helps a team discuss a construction or styling choice, or a small set of stills for comparing garment options. These are workflow recommendations: the final image brief determines how many views the team needs and what each view must show.
CLO's simulation-properties guide identifies Normal, Fitting, and GPU as commonly used simulation presets. It also explains that smaller time steps and more simulation substeps require more calculations and take longer, while CLO recommends default values for several detailed simulation controls. For routine work, keep the simulation choice tied to the garment review purpose and use the documented defaults unless a specific simulation need calls for another setting.
A numerical example helps translate a simulation setting into a review decision. CLO's simulation-properties guide gives a time step of 0.03 divided into 10 substeps, producing an actual interval of 0.003. The guide says smaller intervals improve numerical accuracy and collision stability, while taking longer to calculate.
For example, assume a reviewer flags sleeve-to-avatar contact in a simulated jacket. Record the garment and avatar used for the review, test the documented substep approach against that contact question, and compare the resulting simulation. This keeps the adjustment focused on one fit-review issue; the added calculation time belongs to the simulation stage, while the later image review can focus on framing, light, and fabric appearance.
Once the team is ready to create the image, CLO's render-properties guide documents controls for render quality, light quality, and material quality. Its quality choices are Low, Medium, High, and Very High; increasing the quality setting reduces render speed. That gives you a practical way to test the view and visual setup before spending more time on a higher-quality render. The CLO feature page also links its Render feature to instructions for image and video properties.
A simple review cycle can stay together in CLO: simulate the garment, choose the view, render the image, review it against the brief, then adjust the garment or presentation and render again. Keep product-development decisions, such as whether the fit or drape answers the review question, distinct from presentation decisions, such as whether the image composition communicates the garment clearly.
What sequence moves a simulated garment to a finished image?
Use the following order as a suggested workflow. CLO's documentation describes particular controls, while the sequence below organizes them around a typical apparel image brief.
- Write down the image brief before setting up the render. Record the intended use, audience, view, garment details that must remain visible, background expectations, required image dimensions, and any sizes or colorways to include. A line-review image may need a clear silhouette and construction details. A campaign image may call for a particular crop, scene, and mood. This short brief gives the team a concrete test for the rendered result.
- Prepare the garment and simulate the version under review. CLO simulates fit and drape using the garment, avatar, pattern, and fabric properties. Use a simulation preset suited to the review task, then assess the simulated garment against the fit or drape question in the brief. Review the areas the team needs to discuss, such as silhouette, drape, or a garment-to-avatar collision. Tie any simulation adjustment to an observed garment behavior, such as the reviewer's question about drape or a collision.
- Choose the view that answers the brief. Frame the garment so the required features are visible. A front view can support a front silhouette discussion; a close view can give a reviewer more room to assess a selected garment detail. Camera framing is a general rendering choice: the Blender camera manual explains that the camera determines which portion of a scene appears in the rendered image. Apply the same basic check to your image setup: confirm the garment is framed to show the information the intended viewer needs.
- Set light and material quality for the kind of image you need. In CLO, open Render Properties from the Render Toolbar, as described in the CLO render-property instructions. Use the quality level to balance the image finish and render speed described above. Render a test of the intended view, then raise the quality level if the image brief calls for more detail.
- Render the image and save the image you intend to review. CLO's instructions for copying or saving a render say to use Save Current Image for the preview shown in the Render window. Save the current image, then open the saved file and check that it matches the intended use, framing, and required image dimensions. That final file check is a useful team practice because the saved preview, rather than the image visible only in the application, is the deliverable the reviewer will receive.
- Render selected grading sizes together when a size comparison is the task. CLO's features page, updated 08/12/2026, documents a feature under CLO 2026.1 that lets users select specific grading sizes and render them all at once. Use that option when the review requires images of more than one selected graded size. Keep the size selection tied to the review question, such as checking how the chosen views present a defined range. The feature establishes a multi-size render option, while the brief still determines which sizes and views the team needs.
- Review the saved result against the brief, then choose the next action. Confirm that the garment is framed as requested and that lighting, material appearance, and visible garment details support the review. If the remaining question concerns the garment's fit or drape, return to the simulation and garment setup. If the garment is ready and the issue is image presentation, refine the view or render settings. If the requested delivery requires scene or image-production capabilities outside the team's current workflow, assess a separate application and plan a transfer test.
Consider a sample-size review with three selected grading sizes. The team can simulate the garment, select the sizes named in the brief, and use the documented CLO 2026.1 feature to render those selected sizes together. The team can then review the resulting images against its sizing and presentation questions.
How do I decide whether CLO's renderer meets the image brief?
Choose based on the deliverable, not on a broad label such as “final render.” A final deliverable might be one still for internal review, a multi-size image set, an animation, a staged scene, or layers for later compositing. Each asks the team to produce a different kind of output or exert a different kind of control.
| Image or review need | Workflow direction | Why it fits |
|---|---|---|
| A still image of a simulated garment for design or product review | Start with CLO's internal renderer. | CLO's Help Center confirms an internal renderer for realistic, high-quality images of 3D garments. |
| Several selected graded sizes shown as images | Use CLO's selected-size rendering feature when the installed release includes it. | The CLO features page, updated 08/12/2026, documents this under CLO 2026.1. |
| A view that needs a different crop, camera angle, or lighting treatment | Test the in-CLO render controls against the brief. Consider a separate scene application when its documented staging controls address a specific unmet requirement. | Autodesk's rendering overview explains how camera framing, materials, lights, shadows, and environment affect an image. Adobe's Stager overview describes camera-based scene staging. |
| A still image requiring specific post-effects or image-level color work | Use the built-in workflow if its output meets the brief; add a dedicated post-processing step when the brief names a required effect or correction workflow. | Adobe's Substance 3D Painter post-processing documentation lists effects such as depth of field, bloom, glare, vignette, film grain, tone mapping, and color correction. |
| A motion piece made from multiple frames | Decide whether the required motion can be produced in the team's existing workflow, then plan its frame output and review. | Blender's animation-rendering manual describes an animation render as a series of frames, usually saved to disk as they render. CLO's feature page links Render to its image and video properties instructions. |
| A scene that must support interactive real-time viewing | Choose a scene workflow whose real-time behavior is part of the delivery requirement. | Adobe's Substance 3D Stager overview describes a renderer that switches between real-time rendering and interactive path tracing. Adobe says its real-time mode prioritizes interactive frame rates for test renders, mock-ups, and quick turnarounds. |
| Separate image layers for later adjustment or compositing | Plan a renderer and compositing route that produces the specific layers the team needs. | Autodesk's Arnold AOV guide describes separate render outputs, including light contributions that can be recombined in compositing. |
For a standard garment still, start in CLO and review the saved image at its intended size. Assess whether the image clearly shows the silhouette, required garment details, and material appearance at the intended size. If one requirement remains unmet, name it precisely, such as a specified image effect, a multi-frame delivery, or independently editable lighting layers.
For an image intended for merchandising or presentation, the review can include both garment readability and the scene. Autodesk's rendering overview notes that material appearance, lights, shadows, environment, and exposure all affect the image. These sources offer useful criteria for writing a precise image brief: identify whether the team needs a different background, scene layout, light treatment, camera view, or output behavior.
If the deliverable is a motion sequence, treat it as a sequence rather than a single image. Blender's manual explains that animations comprise frame images and recommends a frame-sequence approach with still-image formats such as JPG or PNG for its documented workflow. Its output instructions distinguish the handling of still renders from animation renders. For a motion brief, choose the frame format, file location, and review points before rendering the sequence.
When does a separate renderer serve a distinct job?
A separate renderer serves a distinct job when the output specification calls for scene or image operations that the team plans to carry out in a dedicated tool. The case is clearest when the brief names a function and a reviewer will inspect the result: a staged setting, a moving sequence, real-time interaction, or separate image components for compositing. A general desire for a more “finished” image is less useful than a requirement that can be checked.
Adobe's Stager overview describes arranging imported 3D assets into scenes and setting camera-based rendering shots. That workflow can suit a garment-image brief that specifies a composed setting around the garment and a planned camera view.
A separate render-and-compositing pipeline is relevant when later image changes need independently rendered components. Autodesk's Arnold documentation describes AOVs, or Arbitrary Output Variables, as outputs that can separate parts of a render into images or layers in EXR files. Its guide gives direct and indirect lighting as components that can be separated and recombined during compositing. Autodesk also describes depth, position, and motion-vector outputs. If an art director needs lighting or depth components adjusted separately after rendering, these are concrete requirements to compare with the team's available render output and downstream tools.
Autodesk's 3ds Max EXR guidance specifically describes Arnold render elements stored in EXR files for compositing in Adobe After Effects and Photoshop. The page also notes an output-path risk for batch rendering AOVs from multiple cameras: files may be overwritten if each output path lacks camera-specific naming. That makes path and file naming part of the handoff plan, not just an end-of-project detail.
Animation is another separate delivery decision, although the project may still use CLO for garment simulation and imagery. If the brief asks for motion, identify whether the team needs a moving garment, a rotating view, camera motion, or a sequence of static poses. Those are different directions for planning frames and approvals. For a rotating view, define the start and end angles; for changing poses, list the poses and garment details each approval frame needs to show.
Use a separate tool only when a concrete requirement justifies the extra scene or handoff work. When the brief calls for a single still of the simulated garment, CLO's own renderer is the direct first workflow to assess.
What should I check when a project needs a separate application?
Treat a transfer as a small technical test before treating it as the production route. Define the output and the receiving application, export a representative garment, inspect what arrived, and render a trial image.
- Name the deliverable and receiving application. Record whether the destination needs a still image, an animation, an interactive scene, or render layers for compositing. Also record the target image dimensions, required views, garment sizes, and whether the receiving application is already fixed by the production team.
- Choose a documented export route. CLO's USD Layer Window manual documents exporting clothing, avatars, and accessories with meshes and materials as USD files. It instructs users to select clothing or trim assets in the 3D or 2D window and choose Export to USD Layer from the object context menu. The manual also says users can name the paths where meshes and materials appear.
- Understand the read-only role of a USDZ export. CLO's USD Layer Window manual documents exporting a selected layer as USDZ and describes that export as read-only. The manual also says an imported USDZ cannot be exported again. Choose USDZ for a read-only delivery; use a regular USD-layer export when the receiving workflow needs an editable asset path.
- Use the receiving-application example to plan the import. NVIDIA's Omniverse USD import instructions for Unity describe an “Import From USD” option that loads assigned textures, and list supported material types for that connector. Those details apply to the documented Unity connector workflow. For a Unity handoff, include the garment's key materials and textures in the test, then inspect their appearance in the imported scene.
- Render one representative test and inspect it in context. Include a garment material with a visible surface treatment, a useful avatar or scene asset if needed, and the view the final deliverable will use. In the receiving application, confirm the garment geometry, material appearance, textures, orientation, scale, and camera framing against the brief.
- Save a repeatable handoff package. Keep the source CLO project, exported asset, receiving-application file, and rendered test image organized with clear garment, size, view, and version labels. If you produce separate render layers or several camera views, define unique names and output paths before batch rendering. Autodesk's Arnold guidance describes how multiple-camera AOV outputs can overwrite one another when output paths do not distinguish the cameras, so explicit naming protects a multi-view handoff.
A limited pilot is helpful when the receiving tool is part of an existing technical pipeline. Export one style with a required view and key material treatment, open it in the receiving application, and record which data arrived and which elements need rebuilding. If the trial meets the brief, document its settings and naming rules for the remaining garment assets. If it exposes a material or format issue, resolve that specific issue before expanding the transfer.
FAQS
FAQ
Can I make the final garment image in CLO?
Yes. CLO includes an internal renderer for images of 3D garments, and the application also simulates garment fit and drape.
Does CLO render selected garment sizes together?
Yes. CLO's feature page updated 08/12/2026 documents selecting specific grading sizes and rendering them all at once under CLO 2026.1.
Should I use a separate renderer for a standard still image?
Start with CLO when the brief calls for a still image of the simulated garment. Consider another application when a named requirement, such as a particular scene workflow or independently adjustable render layers, calls for its documented functions.
What should I test before transferring a CLO garment?
Export one representative garment to the format supported by the receiving application, then inspect its geometry, materials, textures, and framing in a trial render.
Where can I find CLO's rendering instructions?
The CLO Manual includes instructions for Render Properties, saving render images, simulation properties, and USD layers.
Learn More
See how these criteria hold up on the real thing.
Related reading